I’m going to be completely honest with you: this blog is managed with the help of AI. Specifically, a tool called Claude Code from Anthropic. And before you click away thinking this is just another AI slop factory, hear me out, because the way we use it might surprise you.
Every post on Big Guy on Stuff goes through a multi-stage pipeline that handles research, writing, SEO optimization, image creation, and WordPress publishing. I still review and approve everything before it goes live. But the heavy lifting? That’s handled by a system I built inside Claude Code, and I’m going to show you exactly how it works.
Anthropic shipped Claude Code Routines while I was finishing this post, so you’ll see a section below on how that fits in.
Whether you run a blog, a side project, or you’re just curious about what AI automation actually looks like in practice, this post is for you.
What Claude Code Actually Is
Claude Code is Anthropic’s command-line tool for working with their AI models. Think of it as having an AI assistant that lives in your terminal, understands your entire project, and can actually do things rather than just talk about them.
It reads your files. It writes code. It runs commands. It manages git workflows. And critically for what we’re doing here, it supports a system of agents, subagents, and automation hooks that let you build real workflows, not just have one-off conversations.
If you’ve used ChatGPT or other AI chatbots, Claude Code is a different beast. It’s agentic, meaning it can plan multi-step tasks, explore your codebase, and execute changes. It works inside VS Code, JetBrains, or straight from the terminal. And it supports something called MCP (Model Context Protocol) servers, which let it plug into external tools and data sources.
The important distinction: this isn’t a “press a button and get a blog post” situation. It’s a structured system with defined roles, quality checks, and human oversight.
The Pipeline: How One Post Goes From Idea to Published
Here’s the actual content pipeline for Big Guy on Stuff:
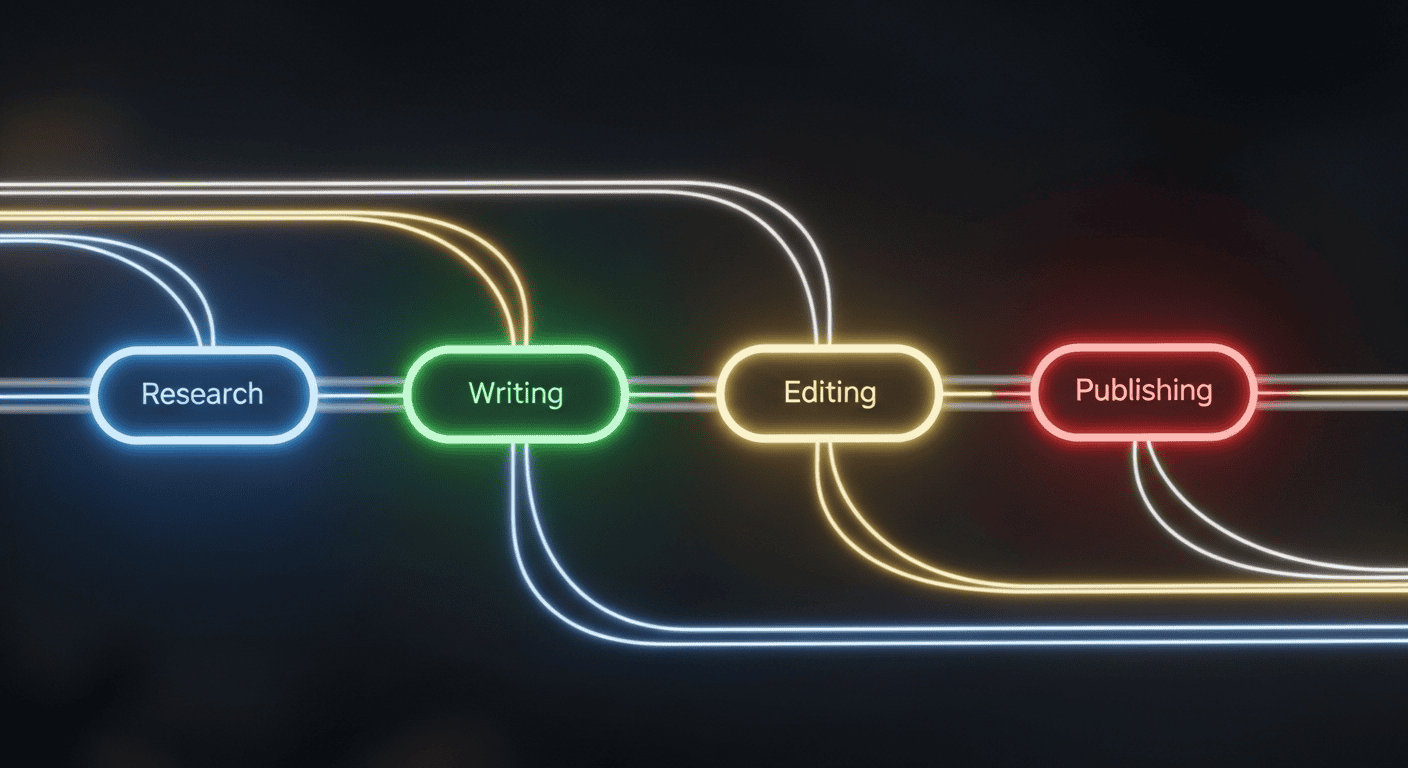
Research comes first. The system identifies trending topics, analyzes what competitors are covering, and finds gaps where we can add genuine value. For a blog about tech from a big guy’s perspective, that often means finding products nobody else is reviewing from our angle.
Planning is next. An editorial planner agent coordinates the calendar, prevents duplicate topics, and decides what type of content fits best (how-to, opinion piece, product review, listicle).
Writing is where the bulk of the work happens. The writer agent works from a research brief, incorporates SEO keywords naturally, and follows a detailed voice profile so posts sound like me and not like a corporate press release. More on that voice profile in a minute.
Fact-checking catches errors, verifies claims, and adds source citations. This matters. AI can hallucinate, and having a dedicated verification step is non-negotiable.
SEO optimization handles keyword strategy, meta descriptions, heading structure, and internal linking. It works from a keyword plan specific to each post.
Image creation generates visuals through API integrations. Featured images, in-post graphics, that sort of thing. (Worth knowing: Claude itself can’t spit out raster images, but it can build diagrams, charts, and animations in code. I broke down what Claude can actually do for visuals without an image model in a separate post.)
WordPress publishing pushes the final product to the site via the WordPress REST API, complete with categories, tags, and scheduling.
Each stage is its own agent with its own job. They pass work down the line like an assembly line, except the foreman is a CLAUDE.md file.
CLAUDE.md: The Brain of the Operation
This is the part that makes everything work. CLAUDE.md is a markdown file that sits in your project root and tells Claude Code everything it needs to know about your project. Think of it as the instruction manual that every agent reads before doing anything.
Our CLAUDE.md defines:
- The blog’s identity, niche, and target audience
- Writing style rules (first person, casual tone, no em-dashes, light emoji use)
- The content pipeline and which agents handle what
- Posting schedule and content mix targets
- Topics to avoid
- File structure so agents know where to find and save things
Here’s why this matters: without a good CLAUDE.md, AI output is generic. With one, the AI operates within guardrails that keep everything on brand. Every agent in the pipeline reads this file and follows its rules. Want the writer to crack self-deprecating jokes? Put it in CLAUDE.md. Need the SEO agent to target long-tail keywords? Define it there.
It’s the single most important file in the project, and setting it up well is worth spending real time on.
A few things I’ve learned managing CLAUDE.md in production: Keep it under ~200 lines. Past that, context gets bloated and you start seeing degraded instruction-following at the end of long sessions. Version it in git like any other config file. When Claude’s behavior shifts unexpectedly, the diff shows you exactly what changed. If you have machine-specific paths or local server URLs, put those in a CLAUDE.local.md file and gitignore it.
Agents and Subagents: How Delegation Works

Claude Code supports subagents, which are specialized AI workers that run in their own context with custom instructions and specific tool access. This is what makes the pipeline possible. I documented exactly how each subagent is wired up in my production workflow if you want to see what this looks like in practice.
Each subagent gets:
- A custom system prompt that defines its role and responsibilities
- Access to specific tools (some agents can write files, others can only read)
- Independent permissions so they can’t step on each other’s work
- Their own context window, which means they focus on their task without getting confused by unrelated information
The main Claude Code session acts as the coordinator. When I say “generate and queue the next blog post,” it kicks off the pipeline, and each agent handles its piece. Subagents can even run in parallel (up to seven at once), which speeds things up considerably when multiple posts are in progress.
The real power here is that you can define these agents once and reuse them. My content writer agent always knows the blog’s voice. My SEO agent always follows the same keyword strategy. Consistency without me having to repeat myself every time.
MCP Servers: Connecting to the Outside World
MCP stands for Model Context Protocol, and it’s how Claude Code talks to external tools and data sources. For a blog automation setup, this is where things get interesting.
MCP servers can connect Claude Code to:
- WordPress (for publishing directly to your site)
- SEO tools for keyword research and competitor analysis
- Image generation APIs
- Analytics platforms
- Pretty much any external service with an API
The setup involves defining MCP server connections in your project configuration. Each server exposes specific “tools” that Claude Code can use. So instead of manually logging into WordPress, copying your post, pasting it in, setting categories and tags, and scheduling it, the WordPress MCP connection handles all of that programmatically.
One important note from experience: don’t go overboard with MCP connections. Each one adds tools to Claude Code’s context, and too many active tools can actually eat into your available context window. The recommendation is to keep it under 10 MCP servers with fewer than 80 total tools. Start with the ones you’ll actually use daily.
Hooks and Scheduled Triggers: Making It Hands-Off
This is where automation gets real. Claude Code has two key mechanisms for running things automatically.
Hooks are shell commands that fire at specific points in Claude Code’s workflow. For example:
- A PreToolUse hook can validate that a post meets your style requirements before it gets saved
- A PostToolUse hook can automatically run a linter or formatter after writing a file
- A UserPromptSubmit hook can inject additional context every time you start a session
You configure hooks through the /hooks command in Claude Code, and they run deterministically. They’re not suggestions to the AI. They execute every single time, guaranteed. That’s important when you want things like “always run the fact-checker before pushing to WordPress.”
Scheduled tasks take it further. You can set up recurring prompts that run automatically on a cadence. “Check the content calendar and generate the next queued post” can run every Monday and Wednesday morning without you touching anything. Cloud scheduled tasks even run on Anthropic’s infrastructure, so they keep going when your computer is off.
For Big Guy on Stuff, we currently run in “draft mode,” meaning everything gets generated and queued, but I review and approve before publishing. When I’m confident the quality is dialed in, I can flip to auto mode and let the scheduled tasks handle the full cycle.
What About Claude Code Routines?
In April 2026, Anthropic launched Claude Code Routines as a research preview. They’re worth knowing about if you’re building something like this.
A routine is basically a Claude Code automation you configure once and run on a schedule, via API call, or triggered by a webhook event. The key difference from the hooks-and-cron approach I described above: routines run on Anthropic’s cloud infrastructure. No laptop running in the background. No cron job to babysit. You set it up in the web platform and it just runs.
There are three execution modes: scheduled (hourly, nightly, weekly), API-triggered (HTTP POST hits a dedicated endpoint), and webhook-based (right now that means GitHub events). Daily usage is capped depending on your plan tier.
Compare that to what this blog does: local scripts, Docker containers, WordPress REST API calls, all running on my own VM. More moving parts, but I own the whole stack. (I wrote a separate post on where I draw the cloud-vs-self-host line if you want the full breakdown.) No vendor dependency, no usage limits, no black box between my pipeline and my server.
Honestly, if you’re starting fresh and want something simple, routines are probably the faster path. For Big Guy on Stuff, I’ll likely stick with the local setup for now because I want that control. But if Routines mature and pick up more connector support, that could change. Anthropic shipped a bigger version of this same idea in May 2026 with Managed Agents (dreaming, outcomes, multiagent orchestration, webhooks), and I broke down which of those features would actually replace pieces of this pipeline in my honest take on Anthropic’s managed agents from an operator’s seat.
Routines are compelling on paper, but there are real reasons to stick with local hooks for now. The Pro plan caps you at 5 Routines runs per day; Enterprise gets 25. For a pipeline that needs to run multiple times a day, that’s a ceiling you’ll hit fast. Routines also require a GitHub-connected repo, so purely local workflows don’t qualify.
There’s also the vendor dependency question. If Anthropic changes the pricing structure or sunsets the feature, you need a fallback plan. With local cron + Claude CLI, I own the whole schedule. Full observability, no daily run cap, no dependency on a feature roadmap I don’t control.
For this blog’s 2-3 posts per week cadence, local hooks remain the right call. It’s the one honest take I haven’t seen anywhere else in coverage of Claude Code Routines.
The Human Layer: Why I Still Review Everything
Here’s the thing about AI-generated content that a lot of people get wrong: the goal isn’t to remove humans from the process. It’s to remove the tedious parts so humans can focus on what matters.
I review every post before it goes live. Here’s what I’m checking for:
- Does it actually sound like me? The voice profile gets it close, but there are always small adjustments. A phrase that’s technically fine but I would never say. An opinion the AI hedged on that I feel strongly about.
- Are the facts right? The fact-checker catches most issues, but I know my niche. If a post says a chair holds 400 pounds and I know from personal experience it doesn’t, that’s my catch.
- Is it genuinely useful? This is the big one. AI can produce technically competent content that says nothing new. If a post doesn’t offer something a reader can’t find in the first three Google results, it doesn’t get published.
- Would I be proud to put my name on it? Sounds simple, but it’s the best filter I have.
The EU is actually formalizing rules around AI content transparency, with new standards taking effect in August 2026. The smart move is to get ahead of that. Be honest about your process. Readers respect transparency way more than they respect pretending AI doesn’t exist.
How to Build Your Own Version of This
If you’re interested in setting up something similar, here’s a practical starting point.
Step 1: Install Claude Code. Anthropic now offers a native installer as the preferred method (no Node.js required, handles auto-updates). You can also use npm: npm install -g @anthropic-ai/claude-code. Either way, you’ll need an Anthropic API key.
npm install -g @anthropic-ai/claude-codeStep 2: Build your CLAUDE.md. Spend serious time on this. Define your blog’s voice, your content types, your publishing workflow, what topics to cover and avoid, and your file structure. The more specific you are, the better your output will be.
Step 3: Define your agents. Start simple. A writer agent and a publisher agent can handle 80% of what you need. Add a researcher, SEO optimizer, and fact-checker as you get comfortable with the system.
Step 4: Set up your file structure. Create directories for briefs, drafts, SEO plans, images, and ready-to-publish content. This gives your agents a clear workflow to follow.
Step 5: Configure MCP servers. At minimum, you probably want a WordPress connection. Add other integrations as needed, but remember the “less is more” rule.
Step 6: Start in draft mode. Seriously. Don’t automate publishing until you’ve reviewed enough output to trust the system. Run the pipeline, review everything manually, and iterate on your CLAUDE.md and agent prompts until the quality is where you want it. (And while you’re at it, think hard about what permissions your agents actually need. Limiting your AI agent’s blast radius is the guardrail most solo devs skip until something goes sideways.)
Step 7: Add hooks and schedules gradually. Once your pipeline is producing consistent quality, add hooks for automated formatting and validation. Then set up scheduled tasks for regular content generation.
A few things I learned the hard way:
- Your CLAUDE.md will need multiple revisions. The first version is never specific enough. When you see output you don’t like, the fix is almost always in the instructions.
- Voice matching takes iteration. Read your AI-generated drafts out loud. If something sounds off, add a rule to prevent it.
- Don’t try to automate everything at once. Get one stage working well before adding the next.
- Keep your context window in mind. Too many MCP tools and overly long system prompts can degrade output quality. Be economical.
Is This Worth It?
Honestly? Yes, but with caveats.
If you’re publishing one post a month, you probably don’t need this level of automation. Just write it yourself.
But if you want to publish multiple times a week with consistent quality, SEO optimization, and proper scheduling, building a pipeline like this saves enormous amounts of time. The research and SEO work alone used to take me hours per post. Now it happens in minutes.
The cost is real, though. Claude Code uses API credits, and a post that processes through the full pipeline consumes a meaningful number of tokens. Anthropic’s prefix caching helps significantly (cached tokens cost a fraction of fresh ones, and repeated context like your CLAUDE.md and agent instructions gets reused efficiently), but budget for it. For a small blog publishing two to three times a week, expect to spend somewhere in the range of a nice lunch per week on API costs.
The bigger investment is the upfront setup time. Getting CLAUDE.md right, defining agents, configuring MCP connections, testing the pipeline. Plan for a solid weekend of work to get the basics running, then ongoing tweaks as you refine it.
For Big Guy on Stuff, it’s been worth every minute. I get to focus on the parts I’m good at (having opinions about products, evaluating products, finding what works for bigger guys) and let the system handle the parts that used to drain my energy (SEO research, formatting, scheduling, publishing logistics). 🛠️ This same mindset is what led me to build Trigli, my AI customer support tool for small businesses. Different problem, same principle: automate the repetitive stuff so you can focus on what actually matters. That said, once you start shipping AI tools to people who depend on them, the build vs. ship gap gets real fast.
Sources
- Claude Code Overview – Anthropic Documentation
- Create Custom Subagents – Claude Code Docs
- Automate Workflows with Hooks – Claude Code Docs
- Claude Code GitHub Repository
- How to Structure Claude Code for Production: MCP Servers, Subagents, and CLAUDE.md (2026 Guide)
- Anthropic Shows How to Scale Claude Code with Subagents and MCP
- Claude Code Hooks: A Practical Guide to Workflow Automation (DataCamp)
- AI Content Guidelines 2026: Best Practices & Compliance
- How I Built an Automated AI Blog in One Afternoon (NoCodeLife)
- Introducing Routines in Claude Code – Anthropic Blog
Got questions about the setup? Want to see a deeper walkthrough of any specific part of the pipeline? Drop a comment below or hit me up on social media. And if you build your own version, I’d genuinely love to hear how it goes. (If you’re also curious about the infrastructure side, I broke down building a Linux home server for under $200 in a separate post. And if you want a real take on what actually makes money with AI, I read 50 AI side hustle articles so you don’t have to. Running the pipeline daily also put me in a front-row seat to the verbal tics and work-deferral behavior Claude Code users are documenting. That also led to a separate post on why I chose Claude over ChatGPT for all of this. Three months of running this pipeline daily is enough runway now for an honest review of what actually held up.) 💬
Who’s writing this: I’m Tommy. When I’m not tinkering with my own self-hosted setup, I run Trigli, an AI customer support tool for small businesses. If the nerdy stuff in this post is your thing, that’s pretty much what I do all day. Come say hi. 👋

Pingback: I Built an AI That Handles Customer Support So Small Businesses Don’t Have To
Pingback: AI Agent Blast Radius: A Solo Dev's Real Guardrails