This may seem a little odd for the site, but it’s something I felt like I had to do after seeing the results. You may have seen a headlight restoration kit in your local auto store or online. Maybe you’ve even seen the guy setup on the side of the road with a sign that says something like “Make your headlights look new again!” There was a guy doing this on a road that we travel frequently just a few weeks ago. Of course every time I drove by it, I thought to myself, “Man, what kind of scam is that?”
The Pitch
A couple weeks ago, a buddy of mine asked me, “Hey, have you seen those headlight restoration kits?” I respond, “Yeah, I have. Do those things actually work?” He proceeded to tell me that, yes, they do work and that he used it on his wife’s vehicle and saw amazing results. He knows about the blog, so he told me that I should order this Sylvania Headlight Restoration Kit off of Amazon, give it a try, and then blog about it. I trust that he wouldn’t tell me this if it wasn’t actually good, but I was still a little skeptical even as I ordered it.
Just How Well DOES it Work?
I’m glad you asked. Let’s get right into it! The Sylvania Headlight Restoration Kit arrived during the week, and I waited until this last weekend to test it out. The friend who told me about it wanted to come over and help. It turns out, I’m glad he did because you have to put quite a bit of elbow grease into this project :).
Before Starting
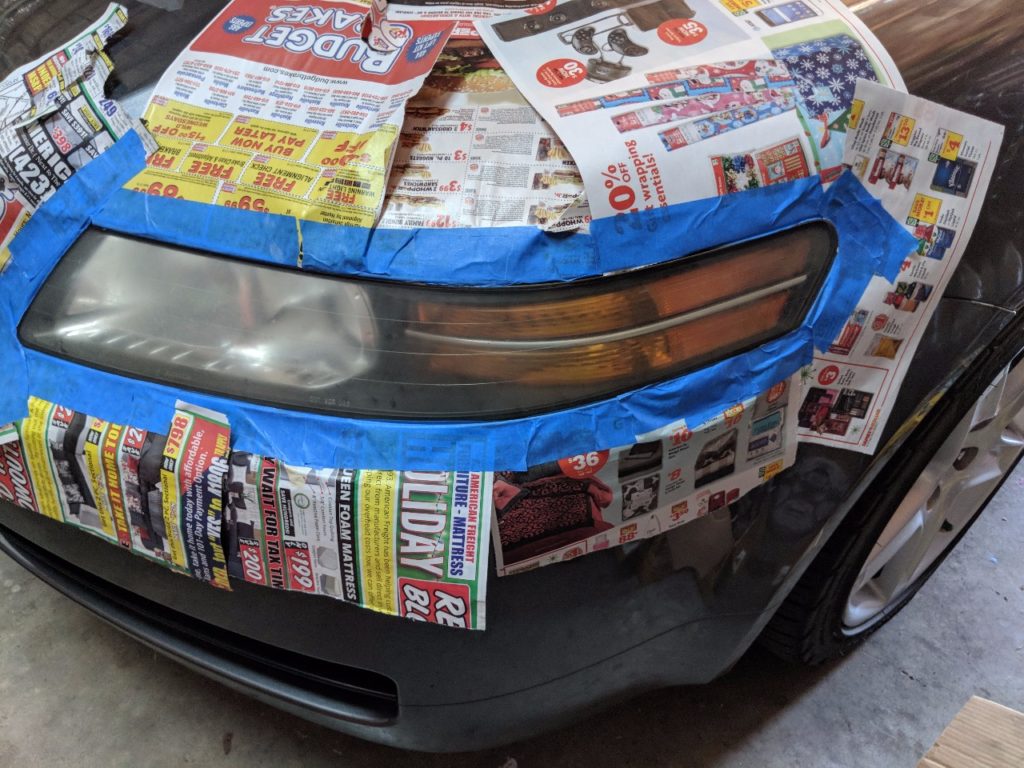
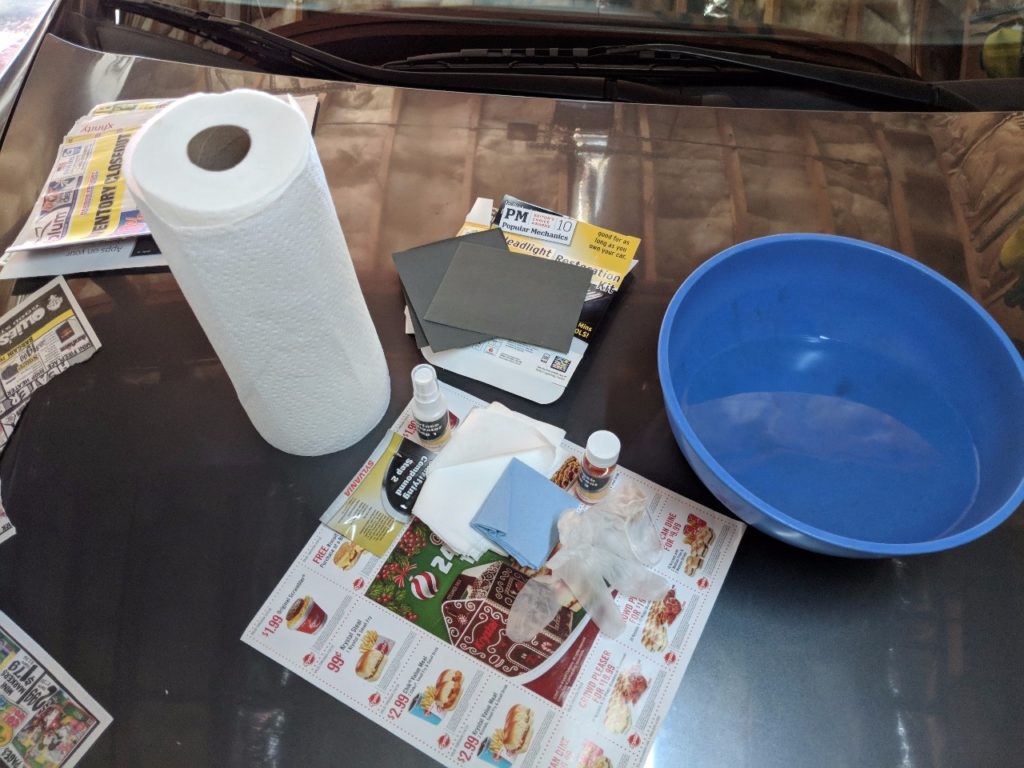
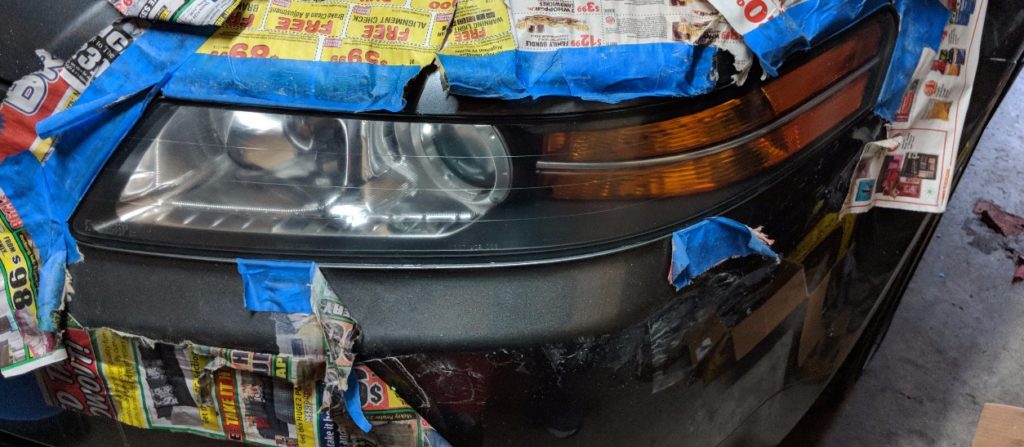
Before you begin the steps listed in the included headlight restoration instructions, you have to make sure you are working with a clean, dry headlight. Knowing this, I took my car to the car wash early in the day. Once we started, both headlights were as clean and dry as they could get. Before beginning, the kit instructions also recommended that we tape off the parts of the car that were around the headlights, so we did. Don’t judge my taping job. I’m not good at the pretty. Below you will also see all of the things we used to do the job except for a squirt bottle filled with water.
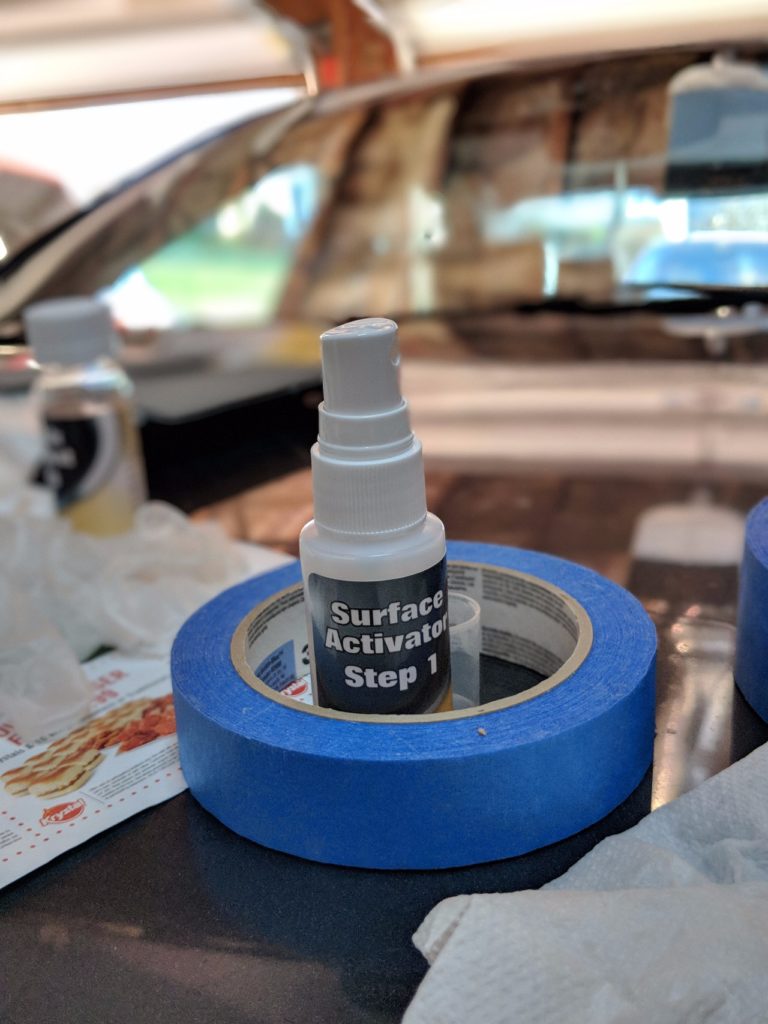
Step 1
Step 2
The next step in the headlight restoration process involves wet sanding the headlights with 3 different grits of sandpaper. You start with 400 grit sandpaper. Wet the sand paper and the headlight down and sand the headlight for 5 minutes. It seemed really odd to me that sanding a headlight would make it any better, but we had already come too far to turn back. After 5 minutes of sanding, you wipe off the headlight, and then you move on to the 1000 grit sandpaper and repeat the same steps. Then after that, you use the 2000 grit sandpaper and do the same thing one final time.

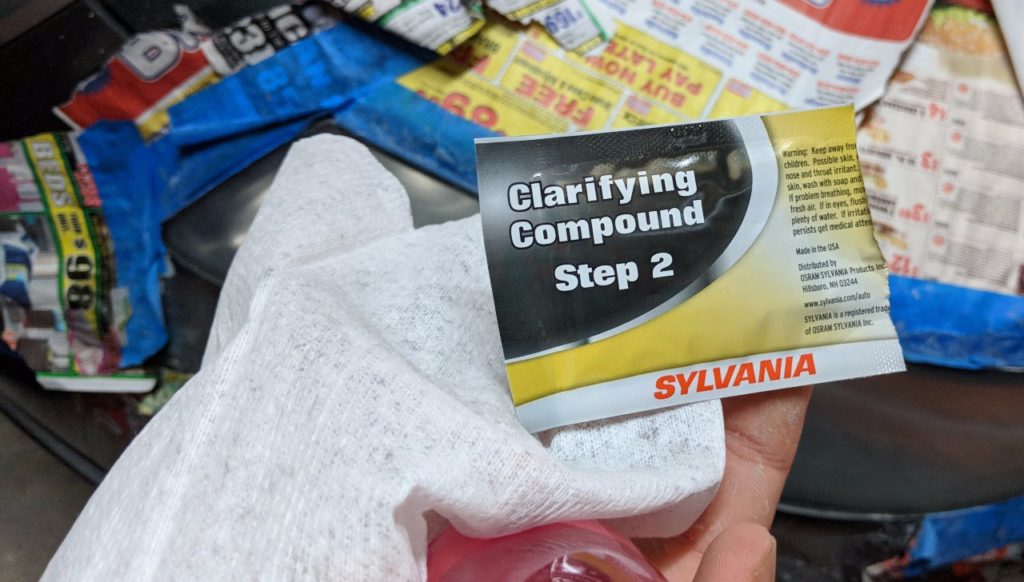
To finish step 2, you have to take the Clarifying Compound, put a quarter sized dollop on a provided towel, and rub it into the headlight for 5 minutes. Immediately after doing this, the headlight looks really good. Then a few minutes after that it starts to haze up again. Time for the third and final step!

Step 3
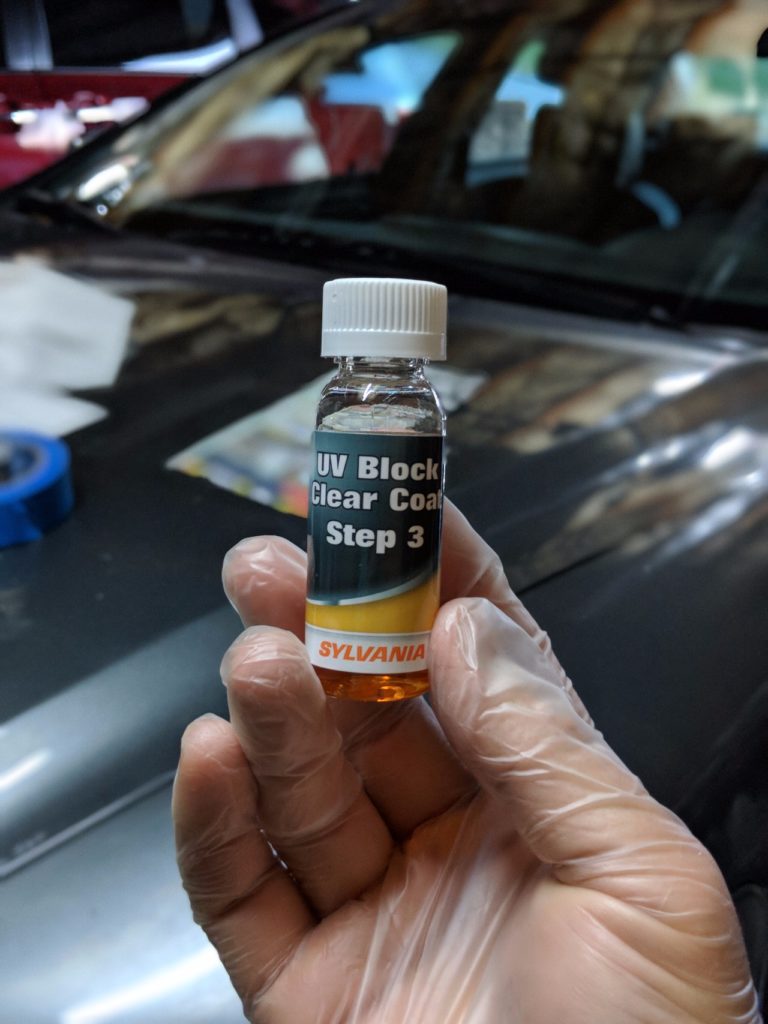
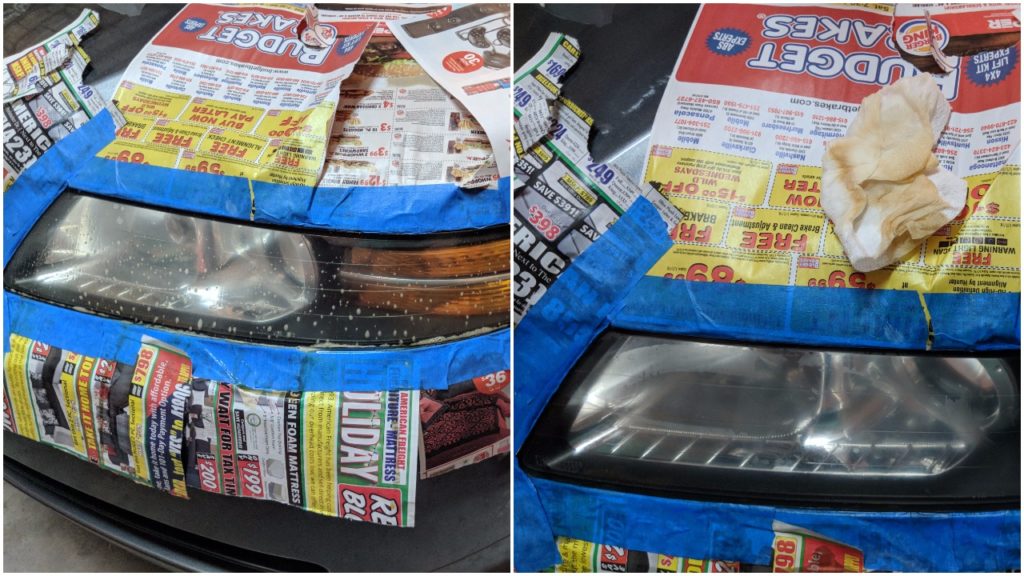
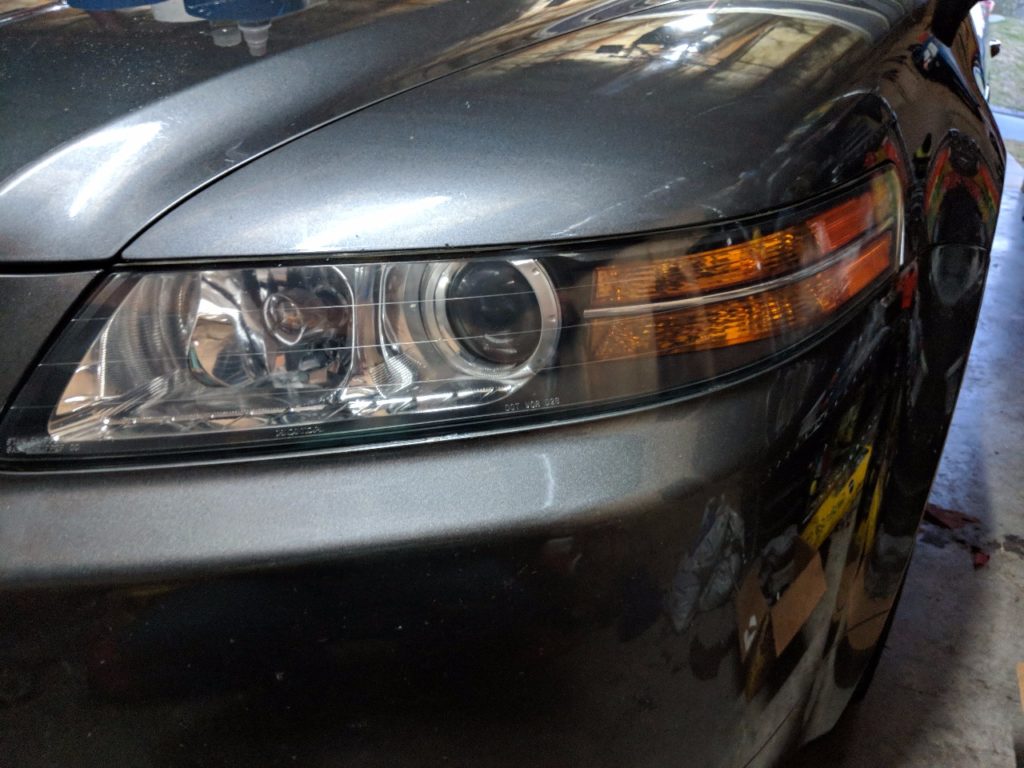
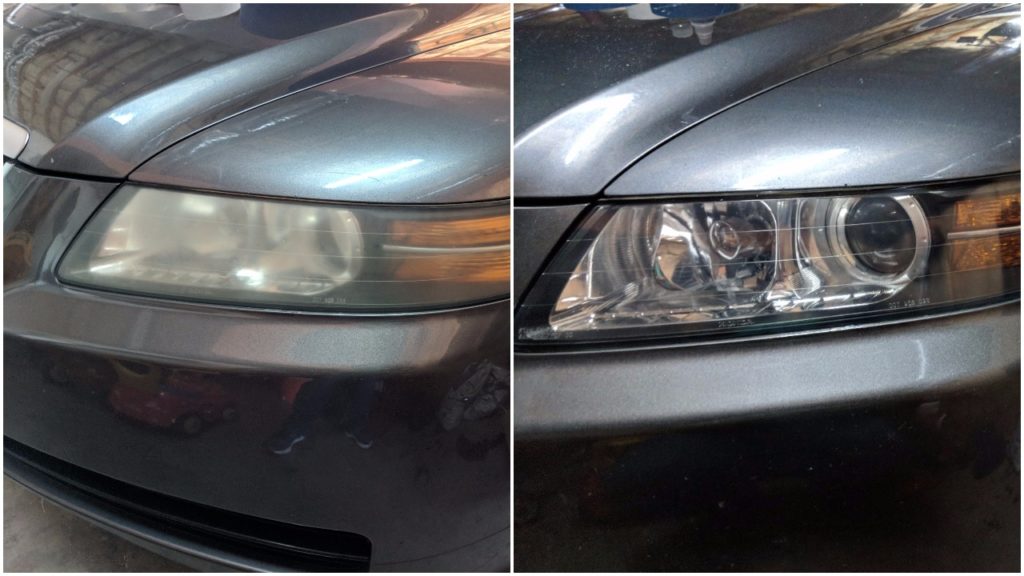
The third and final step is probably the easiest. You slip on the glove that is provided in the box. I will note that this glove fit my big guy hands just fine. Then you take the included UV Block Clear Coat and soak a corner of the included blue towel in it. After that you wipe it on your headlights in a left to right motion while going from top to bottom. The instructions say that it will “immediately” make the light look clear. Boy, did it! As soon as I would go over a part of the headlight with this magic clear coat, it looked fantastic. See below for the final results.
Conclusion
In conclusion, this headlight restoration stuff really works. I’m sure there’s a lot of science behind why it does, and I am still somewhat in disbelief that it actually works, but it does. If your headlights are covered in haze and corrosion, do yourself a favor and try this out before you go and replace the whole headlight enclosure (which is expensive!). You can use the link on the right to try it out. I’ll leave you with the final before and after pic just to show once again how crazy good this actually is.
Cool. You’ll have to do some followup posts to see how well the headlight restoration holds up.
Definitely! I’ve been wondering the same thing myself. We’ll see.
Never tried that but I always use Flitz Metal Polish paste. It’s made with German chemicals and it’s the best polishing paste in the world. I use it to polish my knives, blades, liners, plus I’ve tried it numerous times on headlights, other plastic parts, works amazingly good!
It’s a bit expensive, but I can vouch for it, try it on your plastic interior trims or headlights and they’ll shine like new. You can get it off eBay for like $8 USD for 50 gram tube.
Cool. I’d never had thought to try that on headlights. I noticed the Flitz package says it lasts up to 6 months. I’m wondering how long this stuff lasts. I don’t want to do this every 6 months :).