The CLI is great for testing. It is genuinely not how you want to live with a local AI every day. If you followed the previous post on running Ollama locally, you have Ollama installed and at least one model downloaded. Good. That post covered the foundation. This one is about turning that foundation into something you actually use, a local AI assistant open webui ollama setup that runs in your browser, remembers your conversations, and can answer questions from your own documents without sending a single byte to anyone else’s servers.
No fresh install steps. No rehashing what we already covered. We’re picking up right where that post left off.
What Open WebUI Actually Is
Ollama is the engine. It runs the model, serves the API on port 11434, and handles all the GPU offloading and memory management. Open WebUI is the dashboard and steering wheel. It’s a browser-based interface that talks to your Ollama instance and gives you a proper chat experience instead of a terminal window.
The difference matters if you want to actually use this thing day-to-day. The CLI is fine for a quick test. It’s painful for anything involving a real back-and-forth conversation, file uploads, or switching between models mid-session.
Open WebUI adds a few things the CLI simply can’t do:
- Full conversation history, searchable and organized
- Model switching from a dropdown, no terminal required
- Document uploads you can ask questions about
- Knowledge bases (this is the RAG piece, covered below)
- Multimodal support if your model handles images
- Multi-user access if you want family or team members on the same instance
It’s free. It’s entirely self-hosted. And it looks like a polished product, because it is one.
Installing Open WebUI in Docker (5 Minutes)
One command. That’s the install.
# Pull and start Open WebUI, connecting it to your local Ollama instance
docker run -d \
  -p 3000:8080 \
  --add-host=host.docker.internal:host-gateway \
  -v open-webui:/app/backend/data \
  --name open-webui \
  --restart always \
  ghcr.io/open-webui/open-webui:main
After that finishes pulling, open your browser to http://localhost:3000. Create a local account (this account lives only on your machine, nothing goes anywhere), and your Ollama models show up in the model selector immediately.
One thing worth doing before that: verify your Ollama API is actually responding on the host.
# Verify Ollama is running and responsive before starting the container
curl http://localhost:11434/api/tags
You should get a JSON list of your installed models. If that fails, Ollama isn’t running and Open WebUI won’t connect. Start there before debugging anything else.
The One Networking Gotcha That Trips Everyone Up
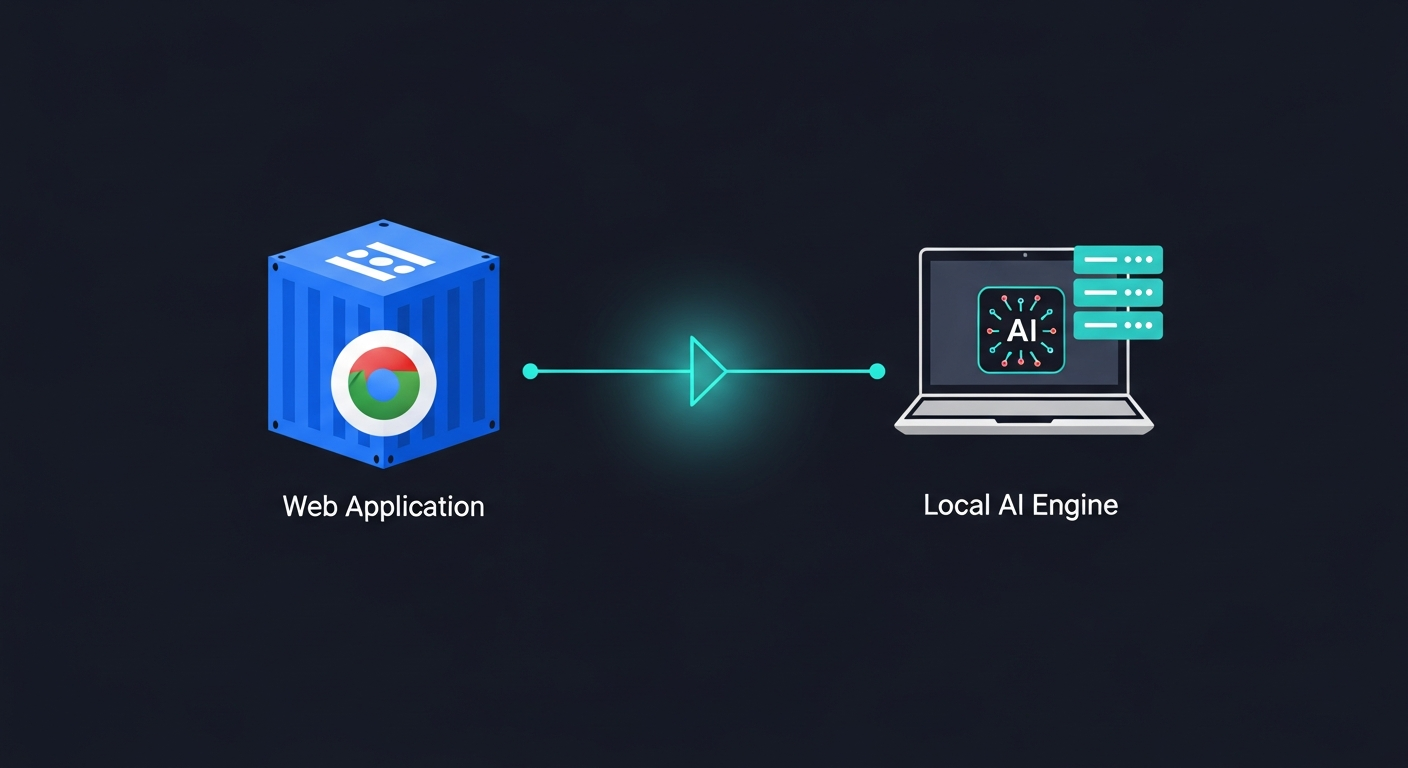
Here’s the thing about Docker networking that catches almost everyone the first time: when a process runs inside a Docker container, localhost means the container itself. Not your computer. The container.
So if Open WebUI (inside Docker) tries to reach Ollama at localhost:11434, it’s looking inside the container for Ollama, where Ollama doesn’t exist. Connection refused. And the error message gives you no hint why.
The fix is host.docker.internal, a special hostname that resolves to your actual host machine from inside a container. Three scenarios to know:
Scenario 1: Docker on Mac or Windows
Docker Desktop handles this automatically. host.docker.internal resolves without any special flags. The command above works as-is. You can verify by running:
# Inside the container (optional verify step)
docker exec open-webui curl -s http://host.docker.internal:11434/api/tags
Scenario 2: Docker on Linux
Linux Docker does not set up host.docker.internal automatically. That’s what the --add-host=host.docker.internal:host-gateway flag in the command above does. It manually creates that hostname mapping. The flag is already in the install command. If you ran it, you’re covered.
If you’re using Docker Compose instead of a raw docker run, add this under your service:
extra_hosts:
  - "host.docker.internal:host-gateway"
Scenario 3: Ollama Is on a Different Machine on Your Network
This is the home lab setup where Ollama runs on a dedicated server (a mini PC, a Proxmox VM, whatever) and Open WebUI runs somewhere else. Skip host.docker.internal entirely. Use the host’s LAN IP directly.
# Replace 192.168.1.50 with the actual IP of your Ollama machine
docker run -d \
  -p 3000:8080 \
  -e OLLAMA_BASE_URL=http://192.168.1.50:11434 \
  -v open-webui:/app/backend/data \
  --name open-webui \
  --restart always \
  ghcr.io/open-webui/open-webui:main
That’s it. 90% of “Open WebUI won’t connect” problems are one of these three scenarios. Pick yours and move on.
RAG Explained: What It Actually Does (And What It Doesn’t)
RAG sounds complicated. The name doesn’t help. “Retrieval-Augmented Generation” is one of those phrases that was clearly invented by someone who didn’t have to explain it to anyone.
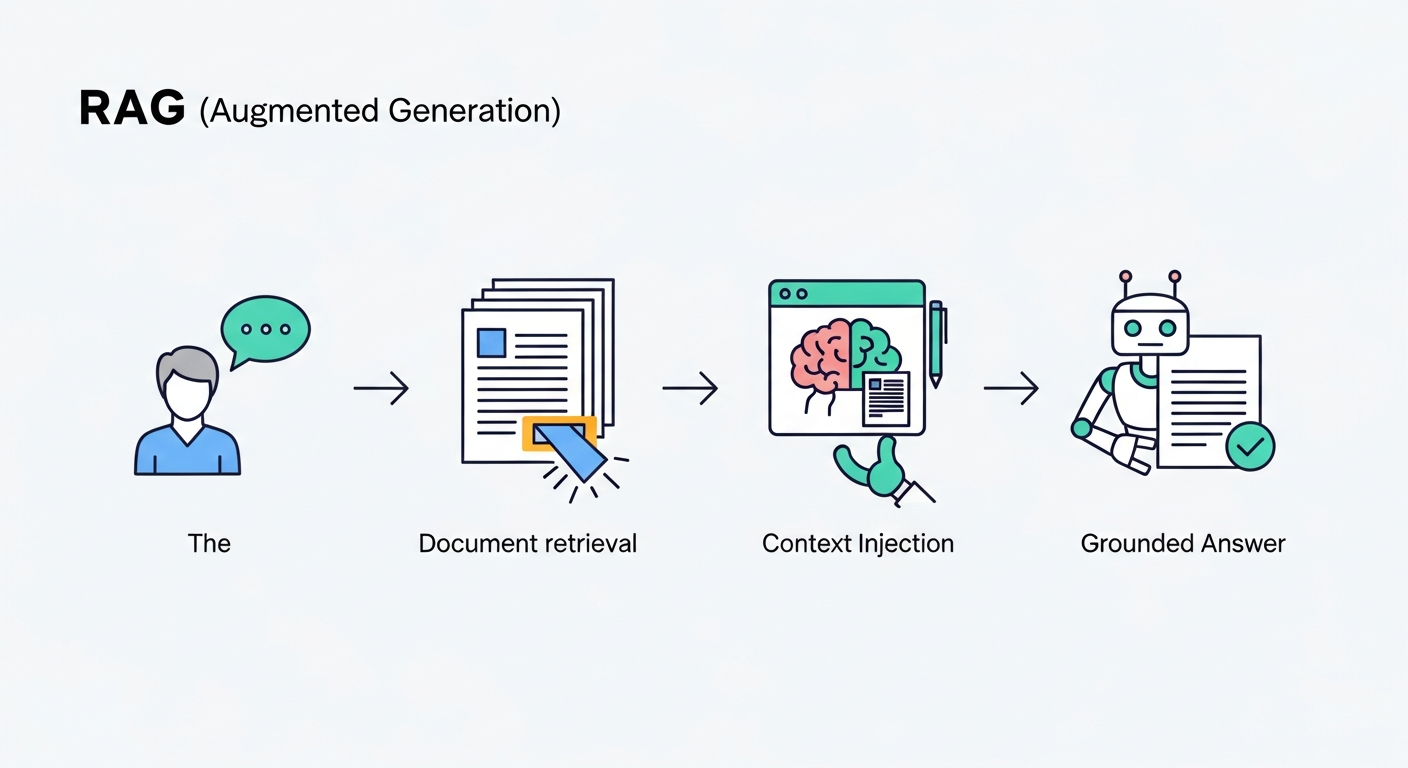
Simple version: RAG does not train the model. Full stop. It does not change the model’s weights. It does not teach the model anything. When you upload a PDF to a knowledge base, you are not making the model smarter about that PDF. You are giving the system a way to find relevant pieces of that PDF and hand them to the model right before it answers your question.
Think of it this way. The model is a contractor who knows a lot of general things but doesn’t know the specifics of your project. RAG is you walking over to the contractor’s desk and handing them your project notes right before asking a question. They read the notes, answer based on what’s in front of them. Walk away, and they don’t remember the notes.
That’s context injection. Not fine-tuning.
Fine-tuning is a different animal entirely. Fine-tuning actually retrains the model on new data, changing its weights so it “bakes in” knowledge. It requires serious compute, careful dataset prep, and usually a few days of training time. It is absolutely not what we’re doing here with a PDF upload and a chat session.
So what can RAG do?
At query time, the system searches your uploaded documents for chunks of text that seem relevant to your question, pulls those chunks into the prompt context window, and the model answers using that retrieved text. The model cites what was handed to it. If your docs cover the question, you get a grounded answer. If they don’t, the model will either say so or hallucinate. The second part matters: RAG doesn’t eliminate hallucination, it reduces it on topics your documents actually cover.
If you ask about something your documents don’t mention, the model is back to answering from its own training data, for better or worse.
Setting Up Your First Knowledge Base in Open WebUI
Open WebUI handles all the RAG infrastructure for you. No Python scripts. No vector database to install. The steps are:
Pull the embedding model first. Open WebUI uses a separate model to turn your documents into searchable vectors. The standard recommendation is nomic-embed-text, pulled via Ollama:
ollama pull nomic-embed-textThen in Open WebUI: Admin Panel > Settings > Documents, set the embedding model to nomic-embed-text. Save.
Create a Knowledge collection. Go to Workspace > Knowledge > New Knowledge. Give it a name that means something to you. “Work Notes.” “Client Docs.” “Research.” “2026 Projects.” Upload your files (PDF, TXT, DOCX are supported). Open WebUI chunks the documents automatically and stores the vectors locally.
Attach the knowledge base to a chat. Start a new chat. Click the + or the Knowledge icon near the prompt box. Select your collection. Now ask your question.
The before/after here is the clearest way to understand why this matters. Ask a fresh chat (no knowledge base attached) a specific question about something in your documents. A detailed question, not a general one. The model will either guess, produce something plausible-but-wrong, or tell you it doesn’t know. That’s the cold hallucination problem.
Now attach your knowledge base and ask the exact same question. The model pulls the relevant chunks from your documents and answers from them. The answer is grounded in what you uploaded. If you’re looking at meeting notes from last week and asking “what did we decide about the project timeline,” it will find and quote that section.
That’s the payoff. And no competitor guide shows this comparison directly.
Real WFH Use Cases Worth Actually Using
Every guide covering this topic writes for developers or teams. Not one frames it around the solo person working from home with a pile of docs they’d love to actually be able to search. That person is who this section is for.
Working from home means accumulating documents. Lots of them. Meeting notes, project summaries, client briefs, saved articles you meant to read three weeks ago, product manuals for things around your office, newsletters full of research. Useful information buried in files you have to manually dig through every time you need something.
A local AI assistant open webui ollama setup changes that workflow considerably. Here’s what it’s actually good for:
Meeting notes and action items. Upload the notes doc, ask “what were the action items from Tuesday’s call” or “what did we decide about the budget.” No manual scanning.
Project context documents. Upload the brief, the spec, the background doc. Ask “what does the client want for the homepage” or “what’s in scope for phase 2.” The model finds the relevant section.
Product manuals and reference docs. Equipment you own, software you use, anything with a dense PDF manual. Instead of ctrl+F-ing through 80 pages, ask the question directly.
Saved research and long-form articles. The stuff you saved to “read later” and never did. Upload it, ask for a summary, or ask specific questions about it.
Private sensitive documents. This is where the privacy angle actually matters. Tax documents, medical records, contracts, anything you’d never paste into ChatGPT. It doesn’t touch OpenAI’s servers. It doesn’t touch anyone’s servers. Your documents and your questions stay on your machine, processed by your hardware.
That last point is where the real WFH case lives, not the tech novelty. Some docs just shouldn’t leave the building.
What to Expect (Honest Performance Notes)
RAG quality is not magic and it’s not uniform. The accuracy of your answers depends on four things, and all four matter:
The model itself. A 3B model is going to give rougher answers than a 13B model on the same documents. If your RAG responses feel shallow or imprecise, try pulling a larger model. Llama 3.1 8B or Phi-4-mini are solid starting points for document Q&A. Qwen3:8b is a meaningful step up and runs well on 16GB RAM, outperforming Qwen 2.5 on most reasoning tasks. Qwen3:14b is even sharper if your hardware can handle it. (If you’re not sure which model to start with, the community model comparison we built from r/LocalLLaMA is a good read before you spend an hour downloading the wrong thing.)
The embedding model. nomic-embed-text is the standard recommendation for a reason. Don’t skip pulling it. The chunk matching quality is noticeably better than the default.
Document quality. Clean, plain text documents work best. Dense PDFs with tables, footnotes, and complex layouts get chunked in ways that confuse retrieval. If you’re getting bad results on a PDF, try converting it to plain text first.
How you ask questions. Specific questions that use language close to what’s in the document give better results than vague ones. “What’s the project timeline?” will retrieve less accurately than “What dates are listed for the launch phase in the project plan?”
Hardware minimums: you need at least 8GB of RAM to run a 7B model. 16GB is genuinely more comfortable and lets you keep things responsive while other apps are running. A dedicated GPU speeds things up a lot. If you’re thinking about setting up a machine specifically for this, a mini PC with 16GB of RAM is a reasonable starting point. I’ve written before about self-hosting a home server on Linux if you want a full guide on building the box first. If you want the honest take on what’s actually worth running yourself vs. not, read my actual self-hosting stack post, or check the mid-2026 state of self-hosting survey for the broader picture on which self-hosted services are worth the maintenance overhead.
Model storage adds up fast. If you end up pulling several models, an NVMe SSD with 1TB or more keeps your boot drive from filling up. Llama 3.1 8B alone is around 4.7GB. You’ll run out of space faster than you expect.
Is Open WebUI Updating Constantly? (Yes.)
It is. The project moves fast. Features that were experimental six months ago are now in the stable release. The Knowledge Base UI has changed a few times. If the menus look slightly different from what I described above, check the Open WebUI documentation for the current path. The concepts are the same even when the navigation changes.
Next Steps After Your Open WebUI Ollama Setup
Once you have the basic open webui ollama stack running and a knowledge base set up, here’s what to explore next:
Web search integration. Open WebUI supports connecting to SearXNG or Brave Search, which lets the model answer questions with live web results grounded alongside your documents. More setup, but powerful for staying current.
Running on dedicated hardware. If you want this available from any browser on your home network 24 hours a day, without leaving your main machine running constantly, put it on a dedicated machine. The home server guide covers the hardware side of that.
Pipelines and Functions. Open WebUI has a Pipelines feature for building automation workflows. If you want the local AI assistant open webui ollama setup to do things beyond chat, that’s the next level to look into.
Open WebUI Docs. Seriously, read them. The project has a lot of features that aren’t obvious from the UI. The docs are well-written and updated with the releases.
The real pro tip from this whole setup is that the knowledge base feature is where the solo WFH use case lives. The chat interface is nice but you could get that from any cloud service. An AI that can answer questions from your private documents without an internet connection is genuinely different. Build that part first. 🖥️
Sources
- Open WebUI Official Documentation
- Open WebUI GitHub Repository
- Ollama Official Site
- Ollama GitHub Repository
- nomic-embed-text on Ollama Library
- Open WebUI + Ollama Guide (Techsy.io)
- Docker Desktop Networking: Connecting container to host services
Got this running? I want to know what you’re actually putting in your knowledge base. Meeting notes? Client docs? A decade of saved browser bookmarks? Drop a comment below and tell me what use case finally made you set this up. And if you hit the Docker networking issue and that section saved you an hour of frustration, share this with whoever else you know who’s running local AI. That’s always the part that gets people. 🤖